Save money, add personality, and impress your guests with these stunning handmade wedding DIY crafts — creative ideas for every skill level and budget.
There is something truly special about a wedding filled with handmade touches. When guests notice the hand-lettered signs, the hand-tied bouquets, or the carefully crafted centerpieces made with love by the couple themselves, it transforms an ordinary celebration into something deeply personal and unforgettable.
Wedding DIY crafts are not just about saving money — though they absolutely can reduce your wedding budget significantly. They are about infusing your celebration with your personality, your story, and your creativity. They are about creating meaningful, one-of-a-kind details that no florist catalog or wedding décor store could ever replicate.
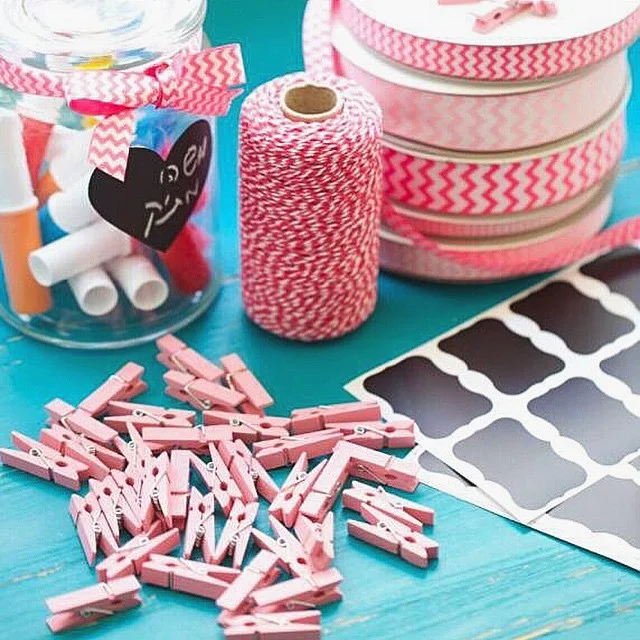
Whether you are a seasoned crafter or picking up a glue gun for the very first time, this guide has something for you. We have compiled 22 of the most beautiful, achievable, and budget-friendly wedding DIY crafts — complete with tips on materials, timing, and how to make each project look truly professional.
Why Choose DIY Wedding Crafts?
Before we get into the ideas, here is why so many couples are embracing the DIY wedding trend:
- Significant cost savings: DIY wedding décor can reduce your overall wedding budget by 20 to 40 percent
- Complete creative control: You choose every color, texture, material, and detail
- Personal meaning: Handmade items carry emotional weight that purchased décor simply cannot replicate
- Unique results: No two handmade weddings look exactly alike
- Memorable process: The crafting journey itself becomes part of your wedding story
- Thoughtful favors: Handmade favors show guests how much their presence means to you
Important Tips Before You Start Crafting
Start early. Begin your DIY projects at least three to four months before your wedding date. Some projects, like paper flowers or macramé, are time-intensive and should be started even earlier.
Test before committing. Always make a test version of each project before creating the full quantity. This helps you refine your technique and avoid costly material mistakes.
Recruit your people. Turn crafting sessions into social events — invite your bridal party, family members, and close friends for crafting afternoons. It is a wonderful pre-wedding bonding activity.
Organize your materials. Keep all project materials sorted and labeled in clear storage boxes so nothing gets lost in the pre-wedding chaos.
Set realistic expectations. Be honest about your skill level and available time. Choose projects that genuinely excite you rather than ones that feel overwhelming.
22 Wedding DIY Crafts Ideas
1. Paper Flower Backdrop
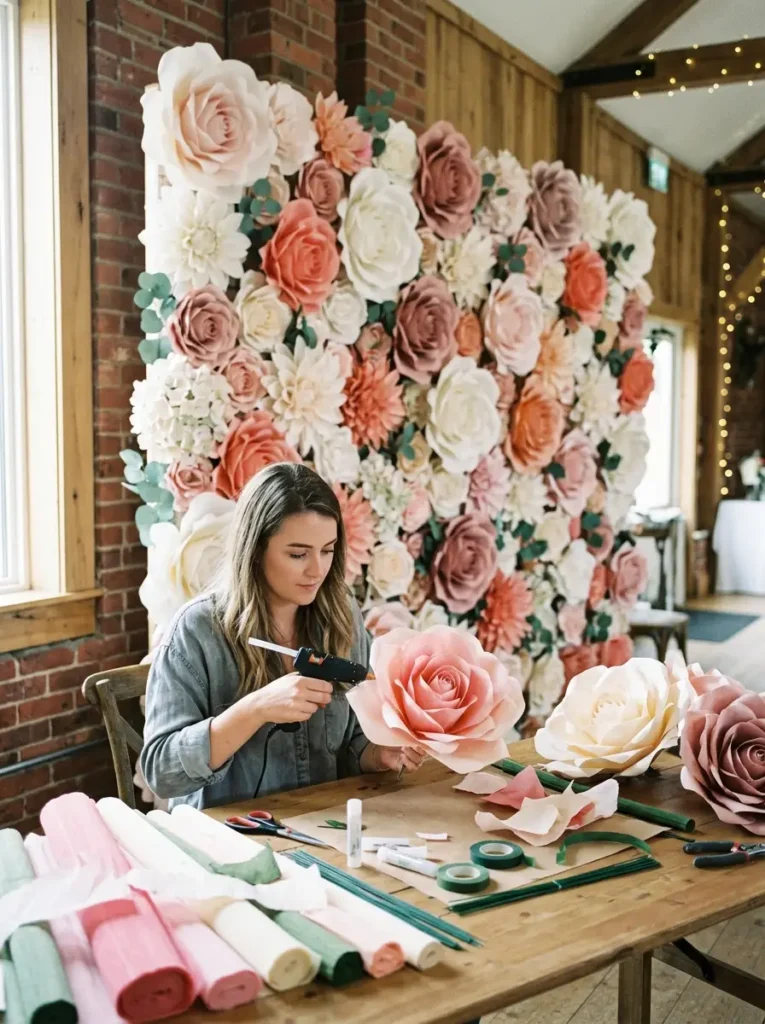
Paper flowers are one of the most rewarding and visually spectacular DIY wedding crafts you can undertake. Giant blooms crafted from tissue paper, cardstock, or crepe paper can be arranged into a stunning ceremony backdrop or reception focal wall that looks magazine-worthy and costs a fraction of a real floral installation.
Materials Needed:
- Tissue paper or crepe paper in your chosen colors
- Floral wire
- Green floral tape
- Hot glue gun and glue sticks
- Scissors
How to Make It:
Stack eight to ten sheets of tissue paper, fold accordion-style into one-inch pleats, tie the center with floral wire, and gently separate each layer upward to form the bloom. Secure to a foam board or wire mesh backdrop frame using hot glue.
Time Required: 2 to 3 hours per large flower; plan for 20 to 30 flowers for a full backdrop
Difficulty Level: Beginner to Intermediate
Cost Savings: A professional paper flower backdrop costs $400 to $800; DIY costs $30 to $80 in materials
2. Hand-Lettered Wedding Signs
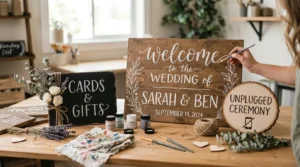
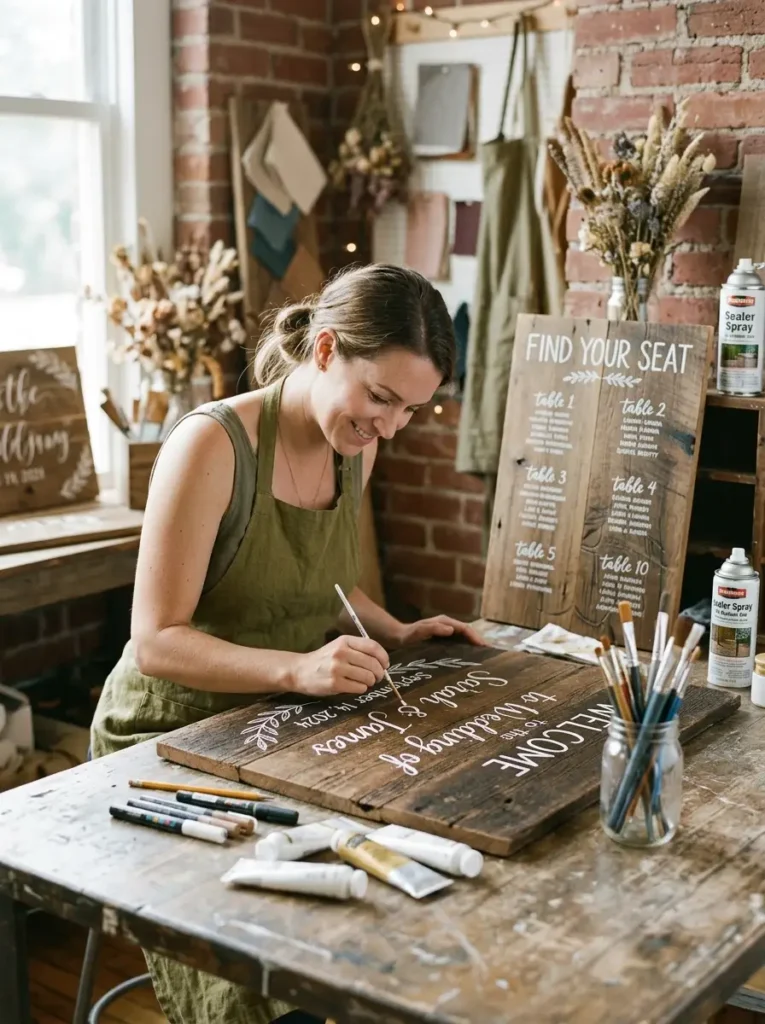
Custom hand-lettered signs add charm, direction, and personality to every area of your wedding venue. From welcome signs and seating charts to bar menus and directional arrows, hand-lettered signage ties your entire aesthetic together in a cohesive, artisanal way.
Materials Needed:
- Reclaimed wood boards or large canvas
- Chalk markers or acrylic paint
- Paint brushes in various sizes
- Pencil for sketching letters before painting
- Sealer spray for outdoor use
How to Make It:
Lightly sketch your text in pencil first, then trace over with your chalk marker or paint. Practice your lettering style on paper beforehand. For a professional finish, use a ruler for alignment guides and erase pencil marks after the paint dries.
Time Required: 1 to 3 hours per sign depending on size
Difficulty Level: Beginner
Cost Savings: Custom signs from calligraphers cost $50 to $200 each; DIY materials cost $5 to $20 per sign
3. Macramé Table Runner
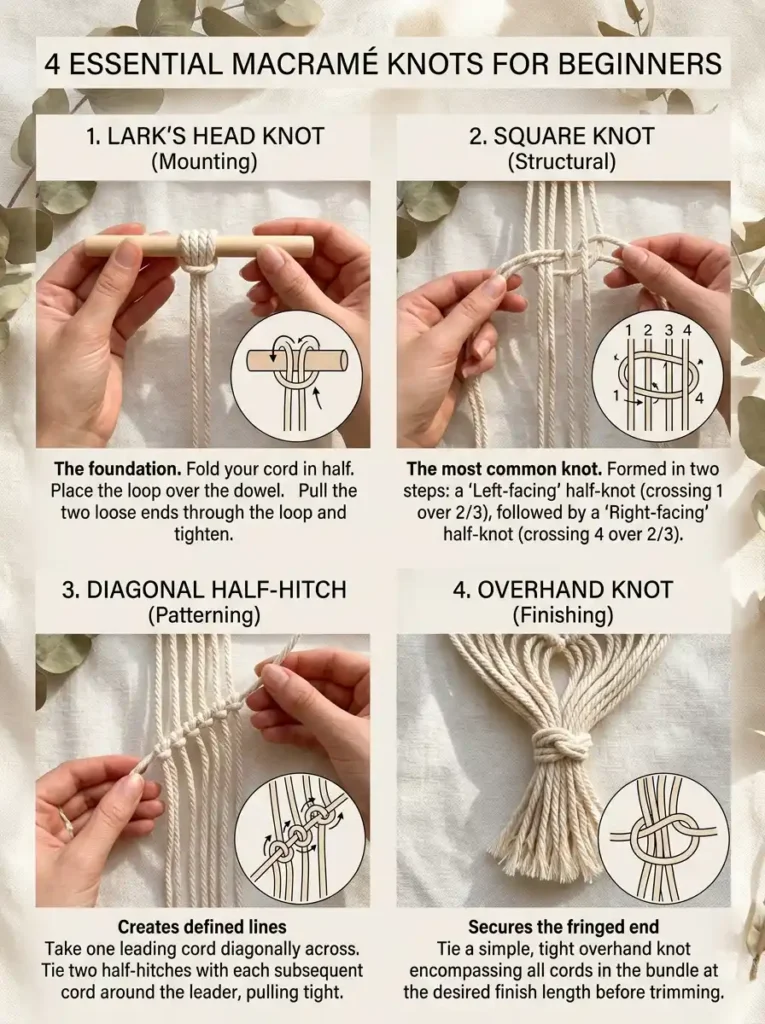
A handwoven macramé table runner adds boho texture and artisanal beauty to your reception tables. Once you learn the basic knots, this project moves quickly and produces a result that looks genuinely impressive. Try different crafts in your fall wedding for aesthetic decor.
Materials Needed:
- Natural cotton macramé cord (3mm to 5mm thickness)
- Wooden dowel or metal rod
- Scissors
- Measuring tape
- Comb for fringe brushing
Basic Knots to Learn:
- Square knot
- Half hitch knot
- Spiral/half square knot
Time Required: 4 to 6 hours per runner
Difficulty Level: Intermediate
Cost Savings: Macramé table runners retail for $40 to $120 each; DIY materials cost $8 to $20 per runner
4. Mason Jar Centerpieces
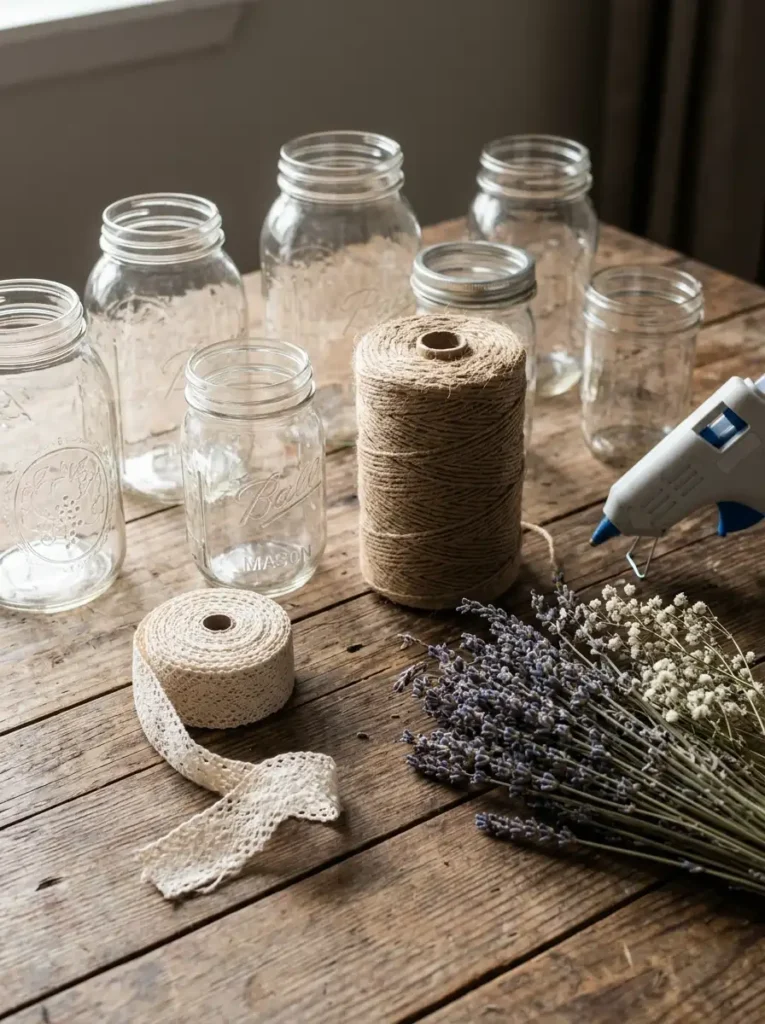
Mason jar centerpieces are a beloved DIY wedding classic because they are endlessly versatile, universally charming, and remarkably easy to create. Whether you fill them with wildflowers, fairy lights, floating candles, or colored water, mason jars instantly establish a relaxed, rustic, and romantic atmosphere.
Materials Needed:
- Mason jars in various sizes
- Twine, ribbon, or lace for decoration
- Hot glue gun
- Fresh or silk flowers, fairy lights, or candles
- Optional: chalk paint for a frosted effect
Creative Variations:
- Wrap jars in hessian fabric tied with twine for a rustic look
- Paint jars in your wedding colors for a modern touch
- Fill with fairy lights and hang from tree branches for an outdoor reception
- Group three jars of different heights for a layered centerpiece effect
Time Required: 30 minutes to 1 hour per centerpiece
Difficulty Level: Beginner
Cost Savings: Florist centerpieces cost $50 to $200 each; DIY mason jar arrangements cost $5 to $20 each
5. Pressed Flower Invitation Suite
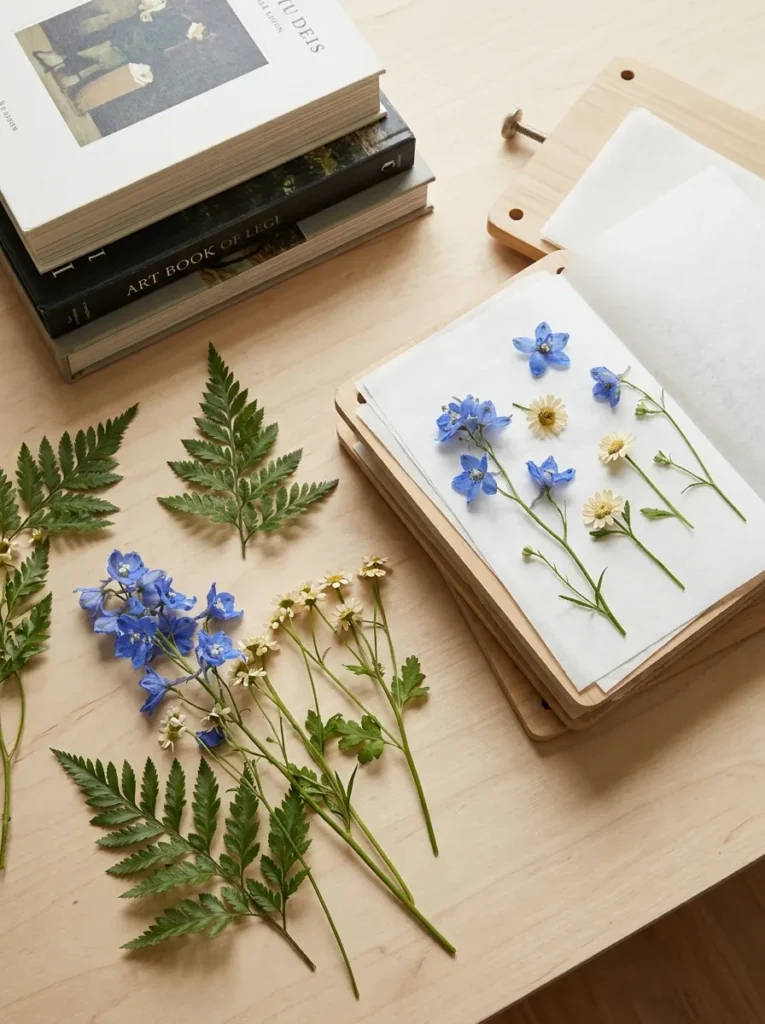
Incorporate real pressed flowers into your wedding invitation suite for a romantic, botanical aesthetic that immediately sets the tone for your celebration. Pressed flowers can be adhered to invitation cards, used to create wax seal designs, or displayed under vellum overlays for an elegant layered effect.
Materials Needed:
- Fresh flowers (pansies, lavender, baby’s breath, and small daisies press beautifully)
- Heavy books or a flower press
- Cardstock in your chosen color
- PVA glue or decoupage medium
- Vellum paper for overlays
- Wax seal kit
How to Press Flowers:
Place freshly picked flowers between sheets of parchment paper inside heavy books. Leave for two to three weeks until completely dry. Arrange pressed flowers on your invitation cards and seal with a thin layer of decoupage medium.
Time Required: 3 weeks for pressing; 2 to 3 hours for assembly
Difficulty Level: Beginner
Cost Savings: Bespoke botanical invitation suites cost $8 to $15 per set; DIY costs $1 to $3 per set
6. DIY Macramé Arch
A macramé ceremony arch is a stunning, boho-chic backdrop that you can create yourself with basic knotting skills and a weekend of dedicated crafting time. The result is a one-of-a-kind ceremony focal point that photographs beautifully and can be repurposed in your home after the wedding.
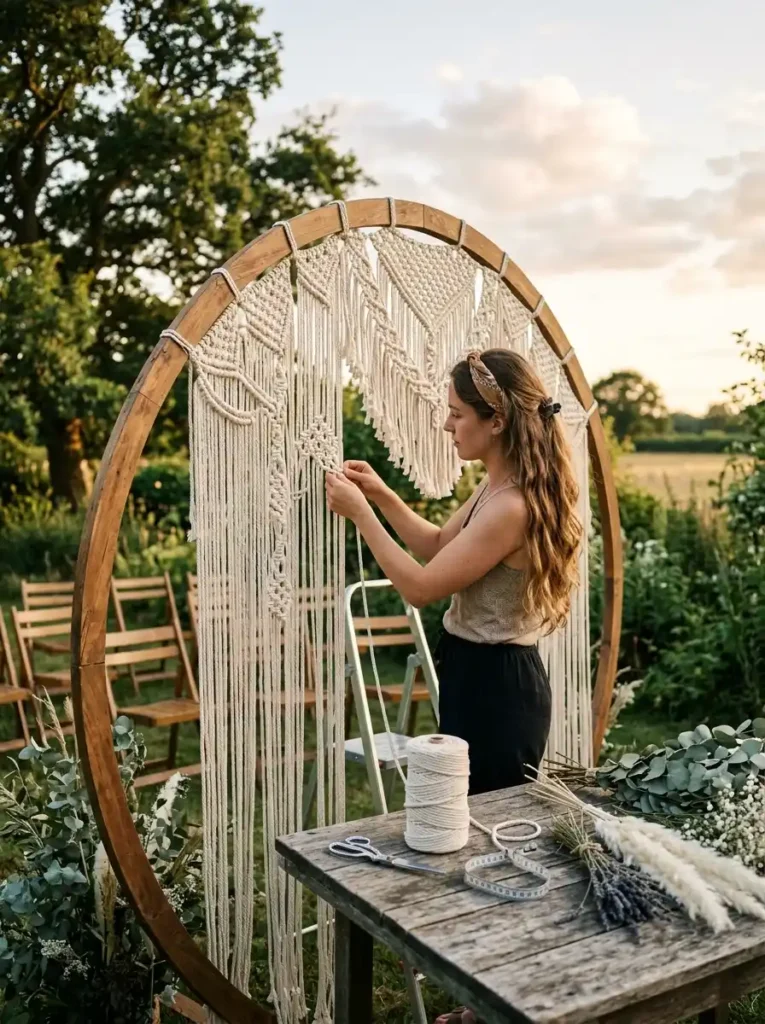
Materials Needed:
- Thick macramé rope (5mm to 8mm)
- Large wooden or metal arch frame
- Scissors
- Measuring tape
- Optional: dried flowers or greenery to weave through the knotting
Time Required: 8 to 12 hours
Difficulty Level: Intermediate to Advanced
Cost Savings: Professional macramé arch rentals cost $200 to $600; DIY materials cost $40 to $100
7. Candle Centerpieces with Greenery
A cluster of pillar candles surrounded by fresh or dried greenery and seasonal foliage creates an effortlessly elegant centerpiece that suits virtually every wedding aesthetic. This is one of the fastest, easiest, and most impactful DIY wedding centerpiece projects available.
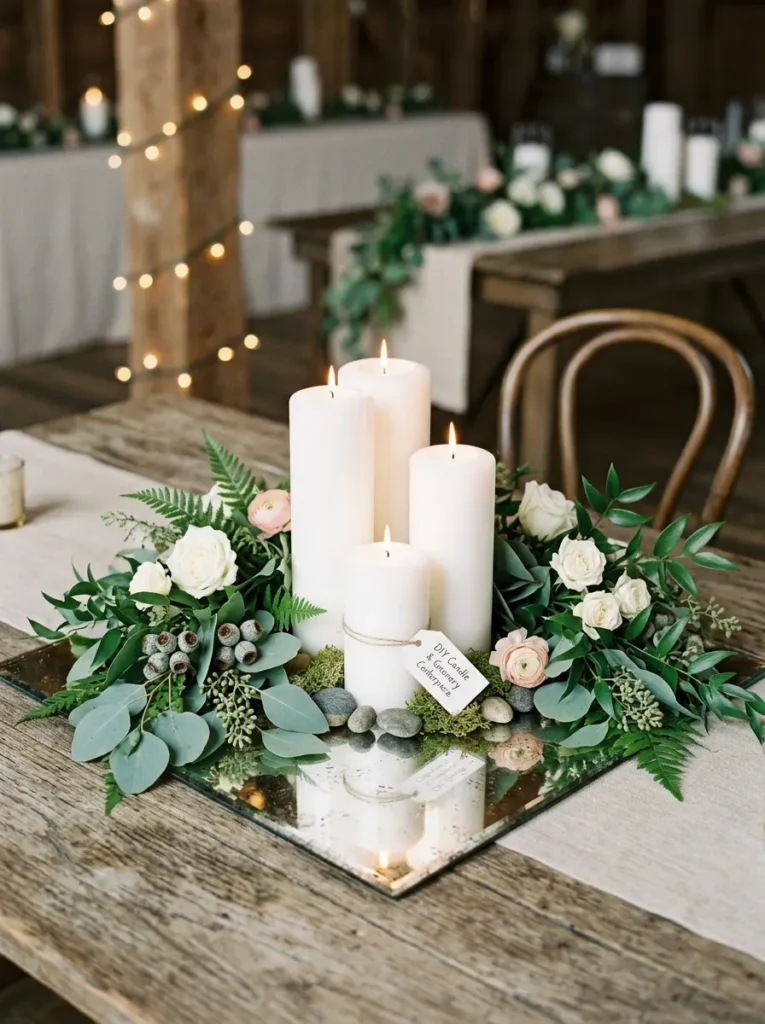
Materials Needed:
- Pillar candles in varying heights
- Eucalyptus, ferns, or seasonal foliage
- Candle holders or mirror tiles as bases
- Decorative stones or moss for filler
- Optional: small flowers tucked among the greenery
Time Required: 20 to 30 minutes per centerpiece
Difficulty Level: Beginner
Pro Tip: Assemble these centerpieces the evening before your wedding to keep greenery fresh. Store in a cool location overnight.
8. Personalized Wedding Favors in Kraft Paper
Handmade wedding favors packaged in kraft paper bags or boxes with personalized stamp designs are charming, budget-friendly, and completely customizable. Fill them with homemade cookies, local honey, artisan tea blends, or seed packets for a favor that guests genuinely appreciate and use.
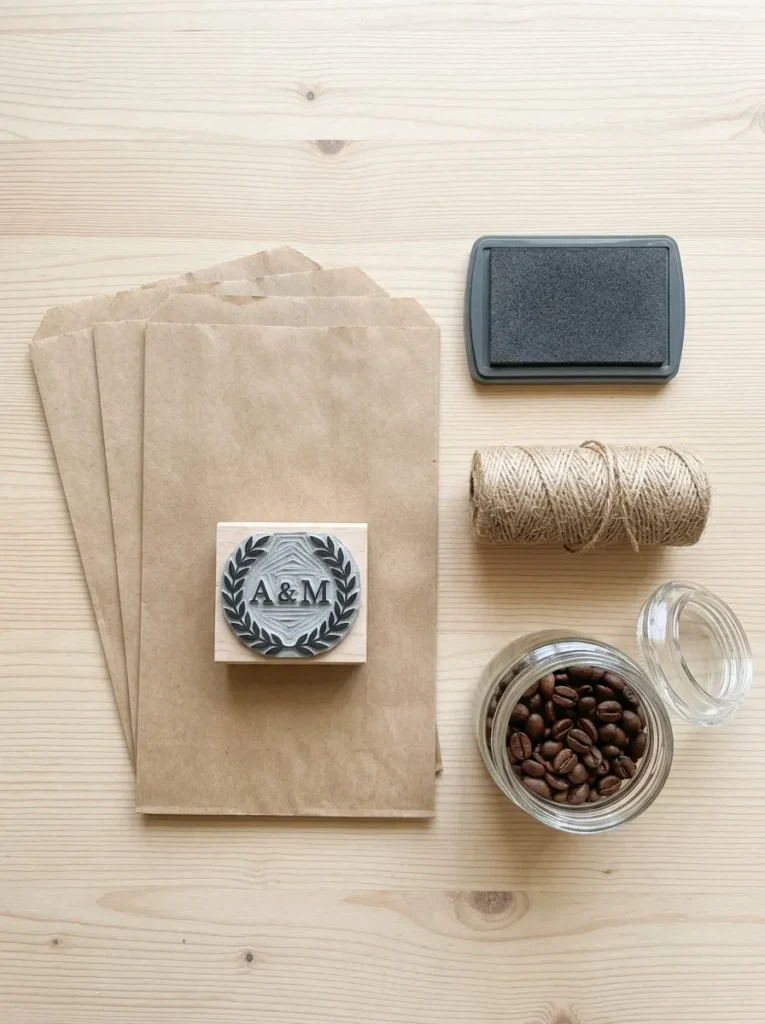
Materials Needed:
- Kraft paper bags or boxes
- Custom rubber stamps with your initials or wedding date
- Ink pads in your wedding colors
- Twine or ribbon for tying
- Personalized tags
Favor Filling Ideas:
- Homemade shortbread cookies or brownies
- Small jars of local honey with a “Sweet as Honey” tag
- Wildflower seed packets with planting instructions
- Artisan loose-leaf tea blends in cloth bags
- Mini bottles of hot sauce labeled with your names
Time Required: 1 to 2 hours for stamping and assembling 50 to 100 favors
Difficulty Level: Beginner
Cost Savings: Custom professional favors cost $3 to $8 each; DIY kraft paper favors cost $0.50 to $2 each
9. Photo Booth Props
A handmade photo booth prop station gives guests a fun, interactive activity during your reception while producing hilarious, memorable photographs that you will cherish forever. Creating your own props means you can personalize them completely to your relationship, your humor, and your wedding theme.
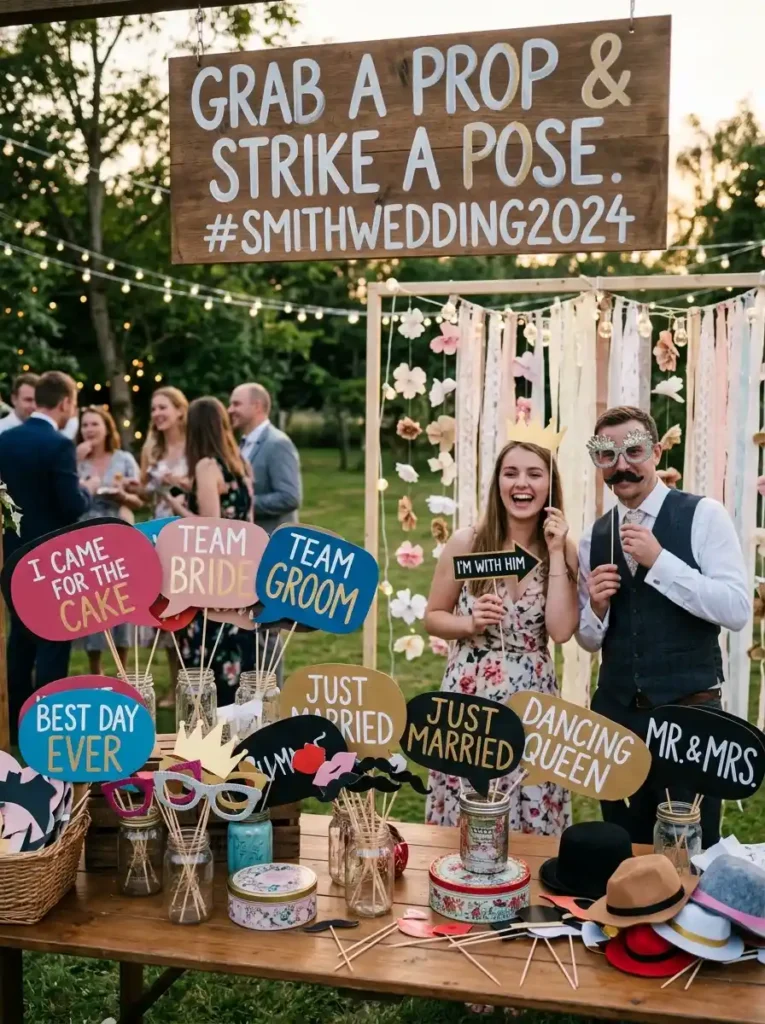
Materials Needed:
- Cardstock or foam board
- Wooden dowels or bamboo skewers
- Hot glue gun
- Markers, paint, and glitter for decoration
- Scissors and craft knife
Popular Photo Booth Prop Ideas:
- Speech bubbles with funny phrases
- Mustaches and lips on sticks
- Crowns and bow ties
- “Mr.” and “Mrs.” signs
- “Just Married” banner props
- Speech bubbles with personalized jokes or inside references
Time Required: 2 to 3 hours for a full prop set
Difficulty Level: Beginner
10. Floral Hoop Centerpieces
Floral hoop centerpieces — fresh or dried flowers arranged around a brass or wooden ring — are one of the most popular contemporary DIY wedding centerpiece trends. They are lightweight, elegant, and incredibly versatile, working beautifully as both table centerpieces and hanging decorations.
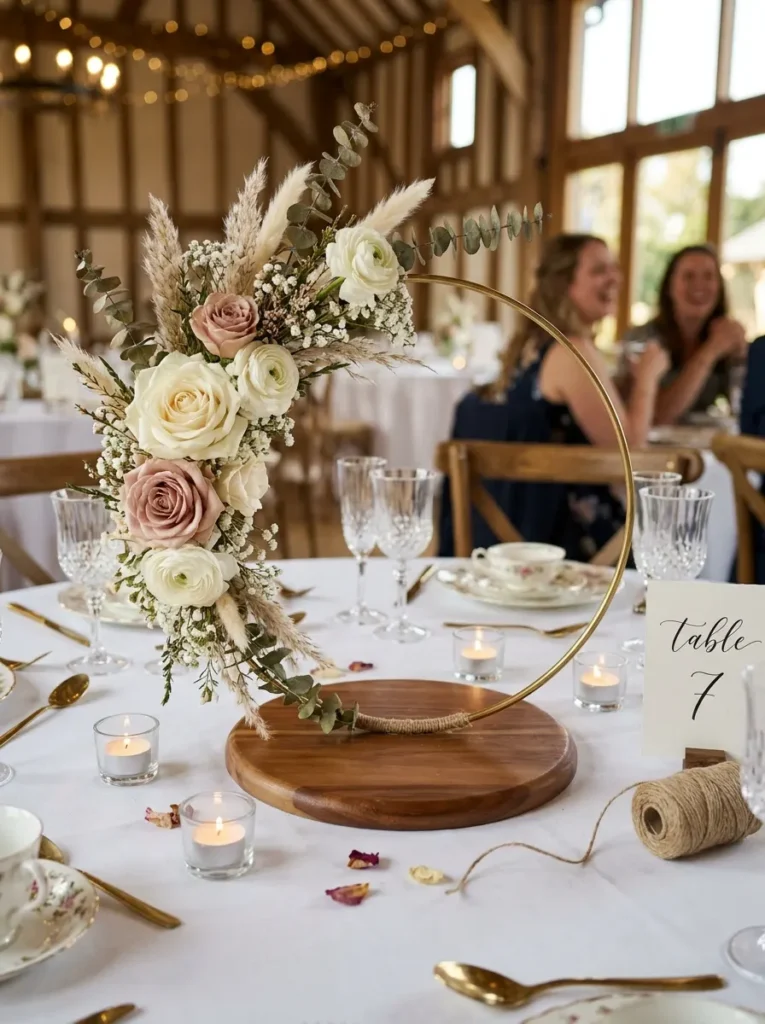
Materials Needed:
- Brass or wooden embroidery hoops (various sizes)
- Floral wire
- Fresh or dried flowers and greenery
- Ribbon or twine for hanging
- Scissors
How to Make It:
Bind small bundles of flowers and greenery to the hoop using floral wire, working around the ring until you achieve your desired coverage. You can leave sections of the hoop bare for a minimalist, modern effect.
Time Required: 1 to 2 hours per hoop
Difficulty Level: Beginner to Intermediate
11. Escort Card Display on Driftwood
Create a stunning escort card display by hanging individual cards from a large piece of driftwood using twine or ribbon. This natural, organic display immediately establishes the rustic, coastal, or boho aesthetic and photographs magnificently as guests arrive at your reception.
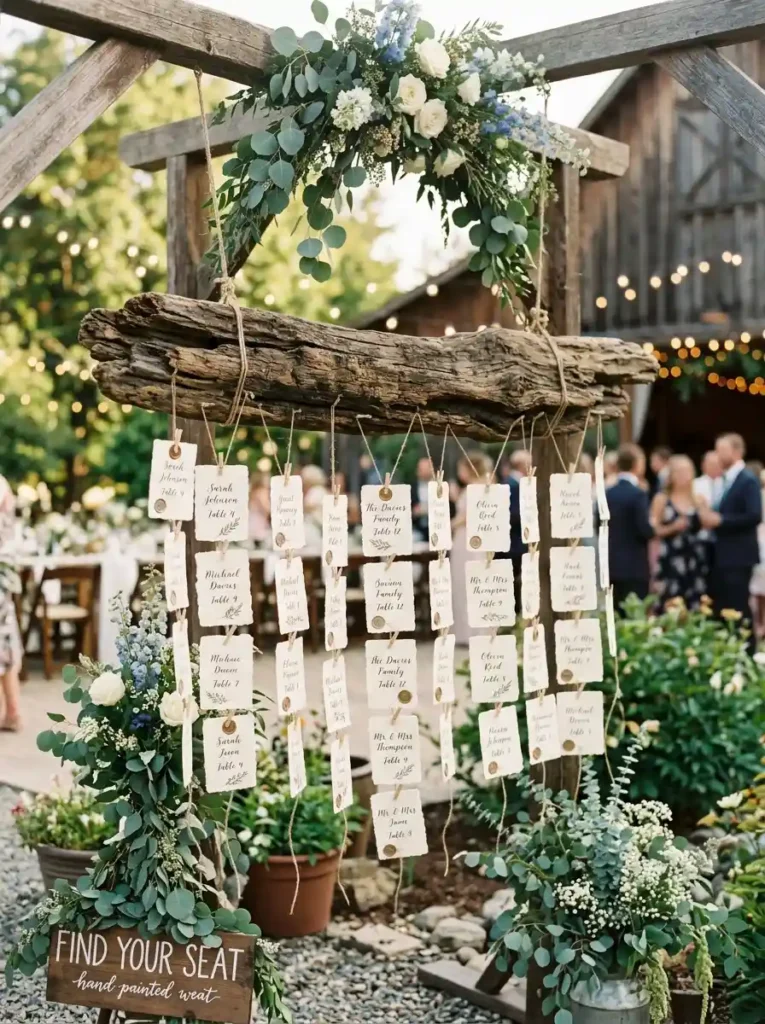
Materials Needed:
- Large piece of driftwood or weathered branch
- Thin twine or ribbon
- Printed escort cards with holes punched in the top
- Two sturdy stands or wall mounting hardware
Time Required: 2 to 3 hours including card printing and assembly
Difficulty Level: Beginner
12. DIY Flower Crown
A handmade flower crown for the bride, bridesmaids, or flower girls is a beautiful, wearable DIY project that adds a whimsical, garden-inspired touch to your bridal party look. Fresh flower crowns can be made the morning of your wedding, while dried flower crowns can be prepared weeks in advance.
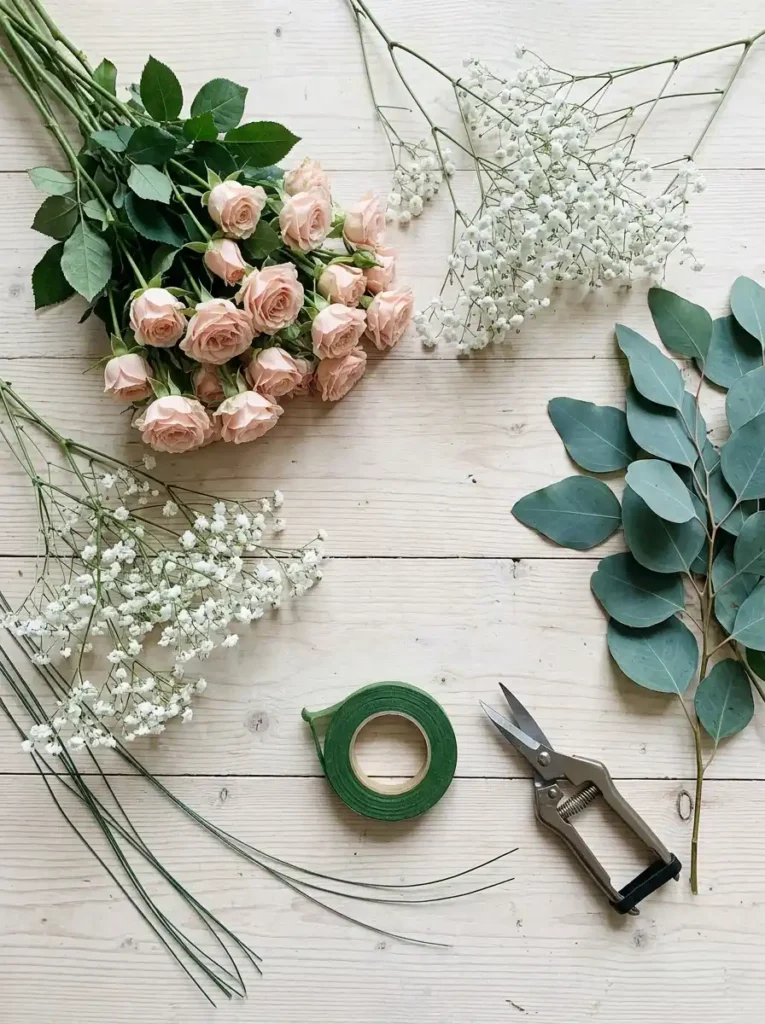
Materials Needed:
- Floral wire (gauge 22 or 24)
- Green floral tape
- Fresh or dried flowers in your wedding colors
- Greenery such as eucalyptus, ferns, or ivy
- Wire cutters
How to Make It:
Measure floral wire around your head and form a circle, twisting the ends to secure. Wrap the frame in floral tape. Cut flowers and greenery into small three to four inch stems and bind them to the wire frame using floral tape, overlapping each bundle to cover the stems of the last.
Time Required: 45 minutes to 1.5 hours per crown
Difficulty Level: Beginner to Intermediate
13. Geometric Terrarium Centerpieces
Angular geometric terrariums filled with moss, succulents, air plants, and small stones make for modern, architectural centerpieces that suit minimalist, boho, or contemporary wedding aesthetics beautifully. They require no floral arranging skills and can be assembled quickly.
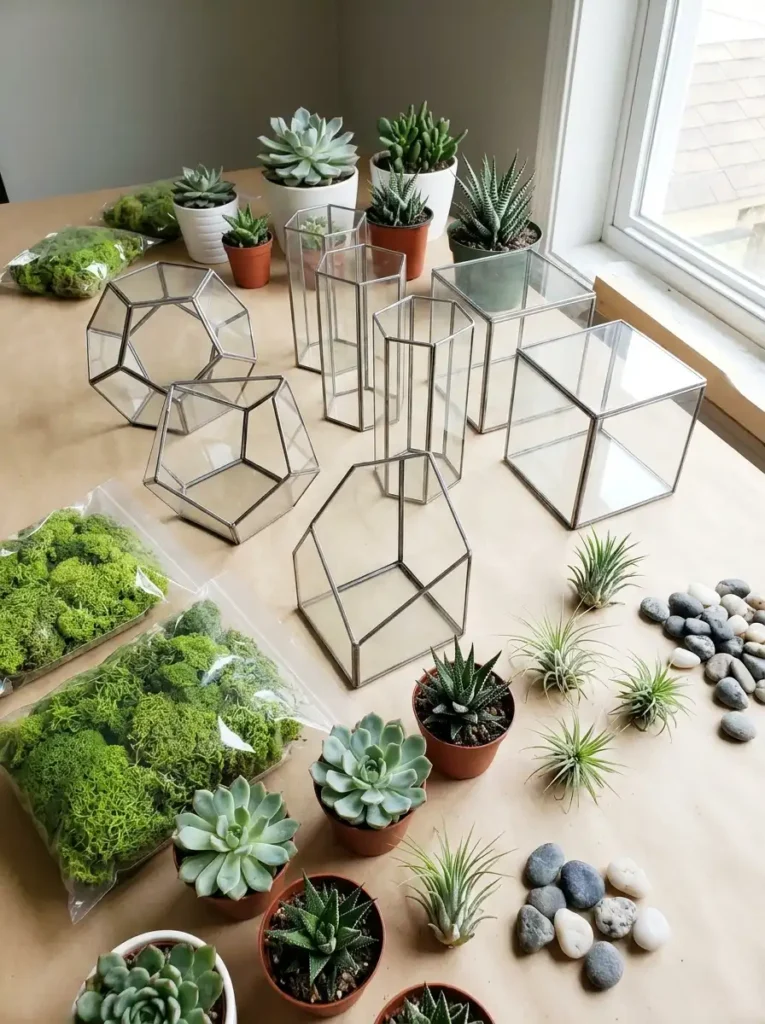
Materials Needed:
- Geometric glass or metal terrarium frames
- Sheet moss or preserved moss
- Small succulents or air plants
- Decorative stones, sand, or soil
- Optional: small fairy lights inside for evening glow
Time Required: 20 to 30 minutes per terrarium
Difficulty Level: Beginner
Pro Tip: Succulents can be planted weeks in advance and will thrive until your wedding day with minimal watering.
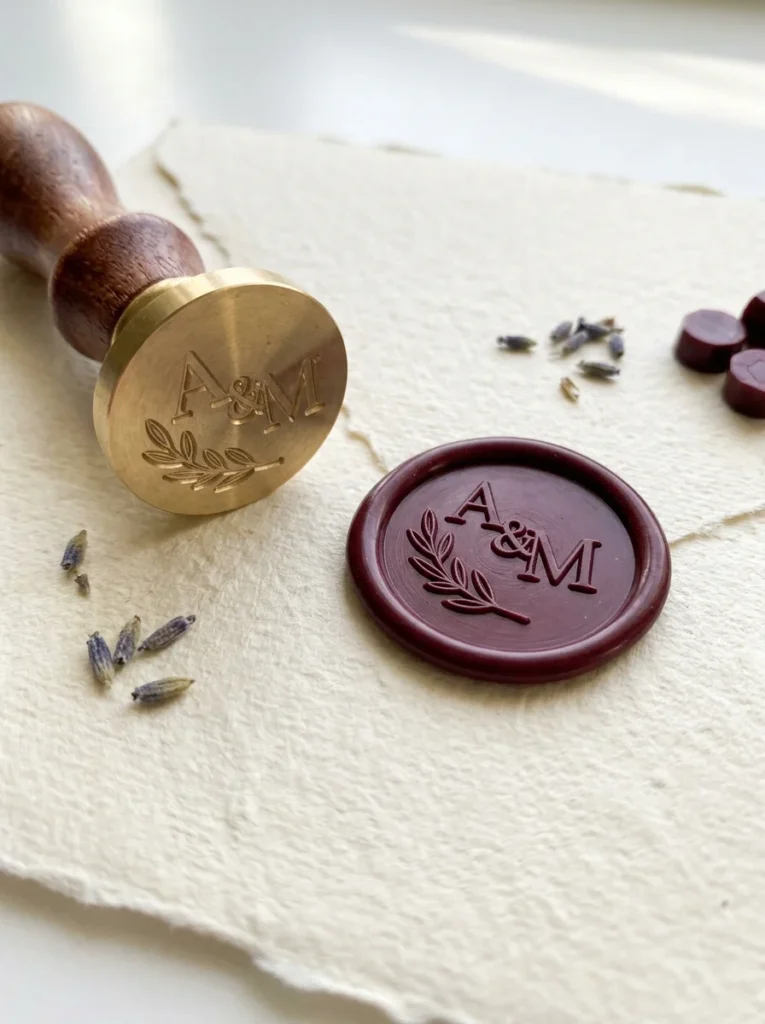
14. Wax Seal Stationery
Custom wax seals elevate your wedding stationery from ordinary to extraordinary. A personalized wax seal stamp featuring your initials, a meaningful symbol, or a botanical design adds a tactile, old-world elegance to invitations, envelope closures, favor tags, and menu cards.
Materials Needed:
- Wax seal stamp (custom or ready-made designs)
- Sealing wax in your wedding colors
- Wax melting spoon or glue gun wax sticks
- Candle or wax melter
Time Required: 3 to 5 minutes per seal; budget 3 to 4 hours for 100 invitations
Difficulty Level: Beginner
Cost Savings: Professional custom wax seal services cost $1 to $2 per seal; DIY kits cost $0.10 to $0.30 per seal
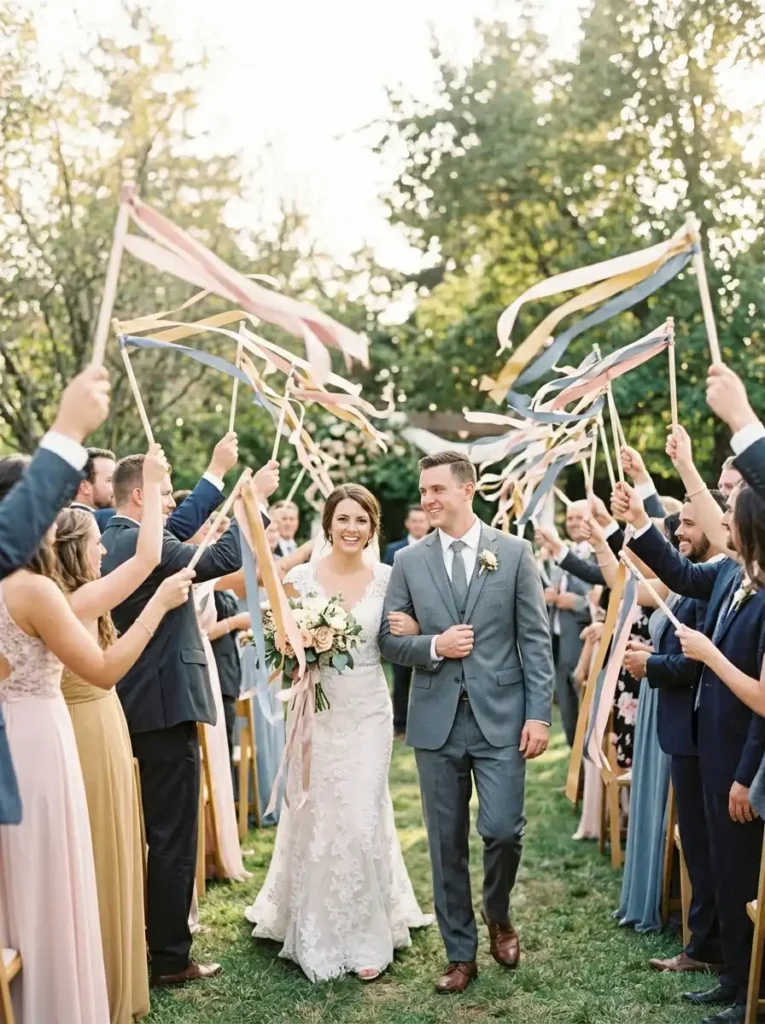
15. Ribbon Wand Exit Ceremony
Replace traditional confetti or rice with beautiful handmade ribbon wands for your ceremony exit. Guests wave these flowing wands as you walk back down the aisle, creating a magical, colorful exit that photographs stunningly and leaves no mess to clean up.
Materials Needed:
- Wooden dowels (12 to 14 inches)
- Satin or organza ribbon in your wedding colors (cut to 18 to 24 inches per piece)
- Hot glue gun
- Optional: small bells or charms at the ribbon ends
Time Required: 1 to 2 hours for 50 to 100 wands
Difficulty Level: Beginner
Cost Savings: Ribbon wands retail for $2 to $5 each; DIY versions cost $0.30 to $0.75 each
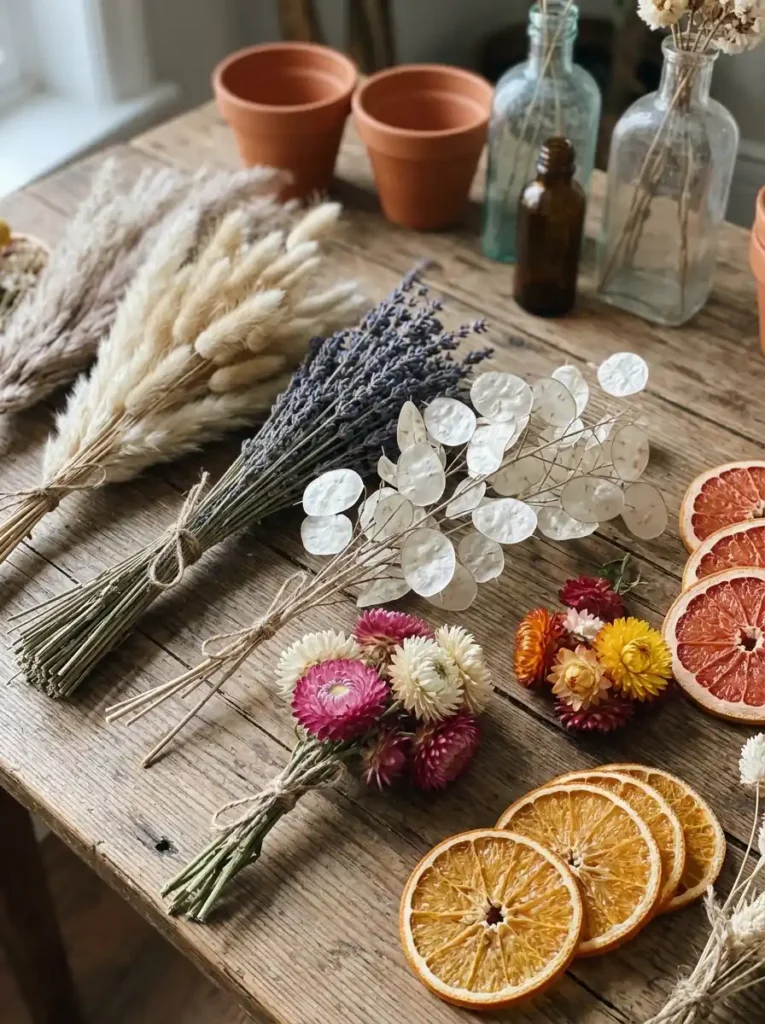
16. Dried Flower Arrangements
Dried flower arrangements have surged in popularity as a wedding DIY craft because they can be prepared weeks or even months in advance, require no refrigeration, and maintain their beauty indefinitely. Pampas grass, dried lavender, lunaria, strawflowers, and dried citrus slices all combine beautifully into arrangements with a romantic, nostalgic quality.
Materials Needed:
- Assorted dried flowers and botanicals
- Floral wire and tape
- Vases, bottles, or baskets as vessels
- Scissors
Best Flowers for Drying:
- Lavender
- Pampas grass
- Strawflowers
- Baby’s breath
- Lunaria (money plant)
- Statice
- Amaranth
Time Required: Allow 2 to 4 weeks for air drying fresh flowers; 1 hour per arrangement for assembly
Difficulty Level: Beginner
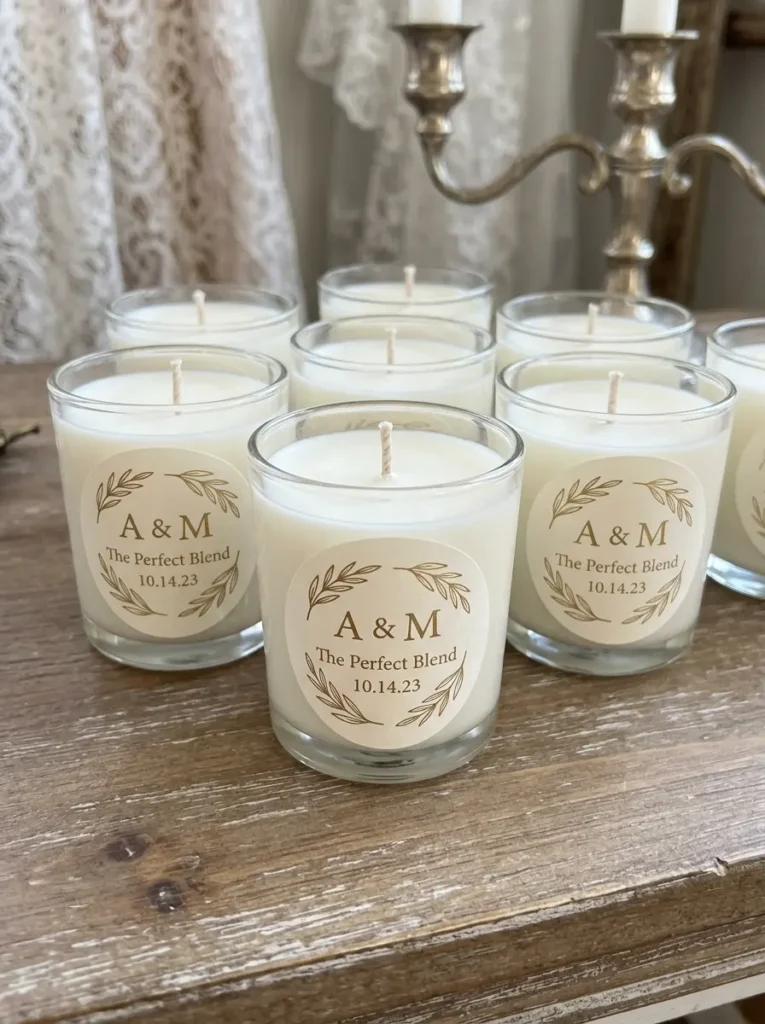
17. Candle Favors with Personalized Labels
Small handmade candles in glass vessels with custom personalized labels are one of the most universally appreciated wedding favor ideas. Guests actually use candles, the scent can be chosen to evoke a meaningful memory, and the labels can be designed to perfectly match your wedding aesthetic.
Materials Needed:
- Soy wax flakes
- Candle wicks and wick holders
- Fragrance oils in your chosen scent
- Small glass jars or tins
- Custom printed or handwritten labels
- Double boiler for melting wax
Popular Scent Ideas:
- Vanilla and sandalwood for a warm, romantic scent
- Lavender and eucalyptus for a calming, spa-like fragrance
- Citrus and ginger for a fresh, uplifting aroma
- Rose and amber for a classic, floral wedding scent
Time Required: 2 to 3 hours for 50 candles (plus cooling time)
Difficulty Level: Beginner to Intermediate
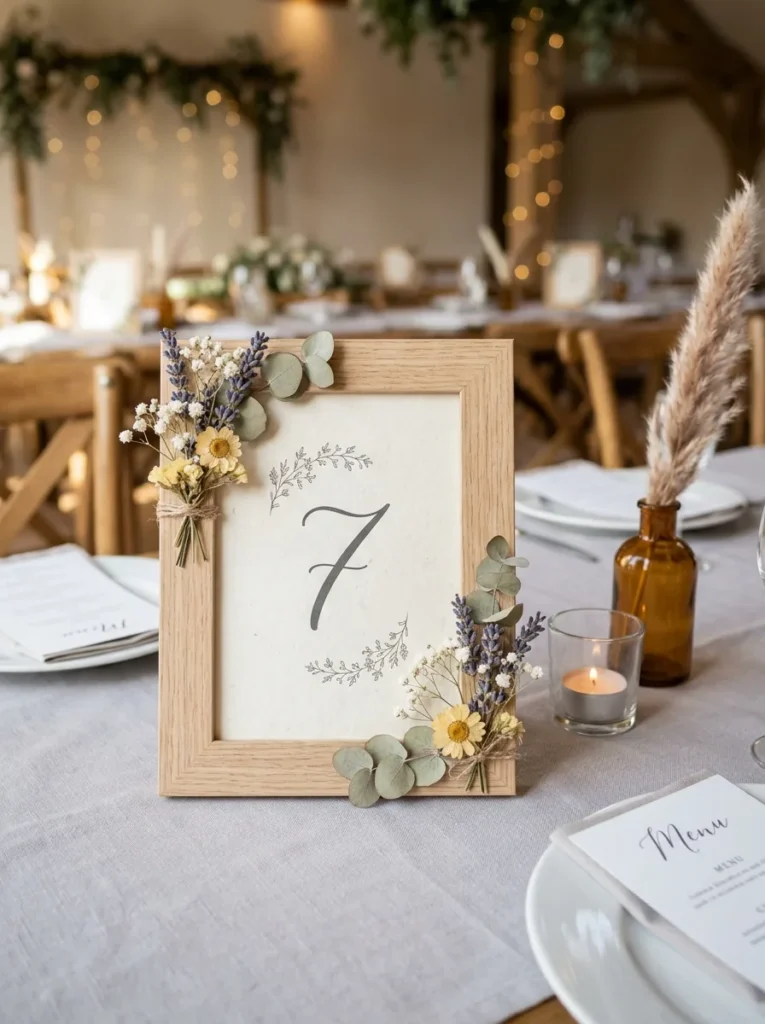
18. Table Number Frames with Dried Flowers
Create beautiful, coordinated table numbers by displaying printed numbers inside simple frames decorated with small dried flower clusters, pressed botanicals, or eucalyptus sprigs. These take just minutes to assemble and create a cohesive, polished look across all your reception tables.
Materials Needed:
- Small photo frames (4×6 or 5×7)
- Printed table numbers in your chosen font and color
- Dried or pressed flowers and greenery
- Hot glue gun
- Optional: gold or copper paint for frame edges
Time Required: 15 to 20 minutes per table number
Difficulty Level: Beginner
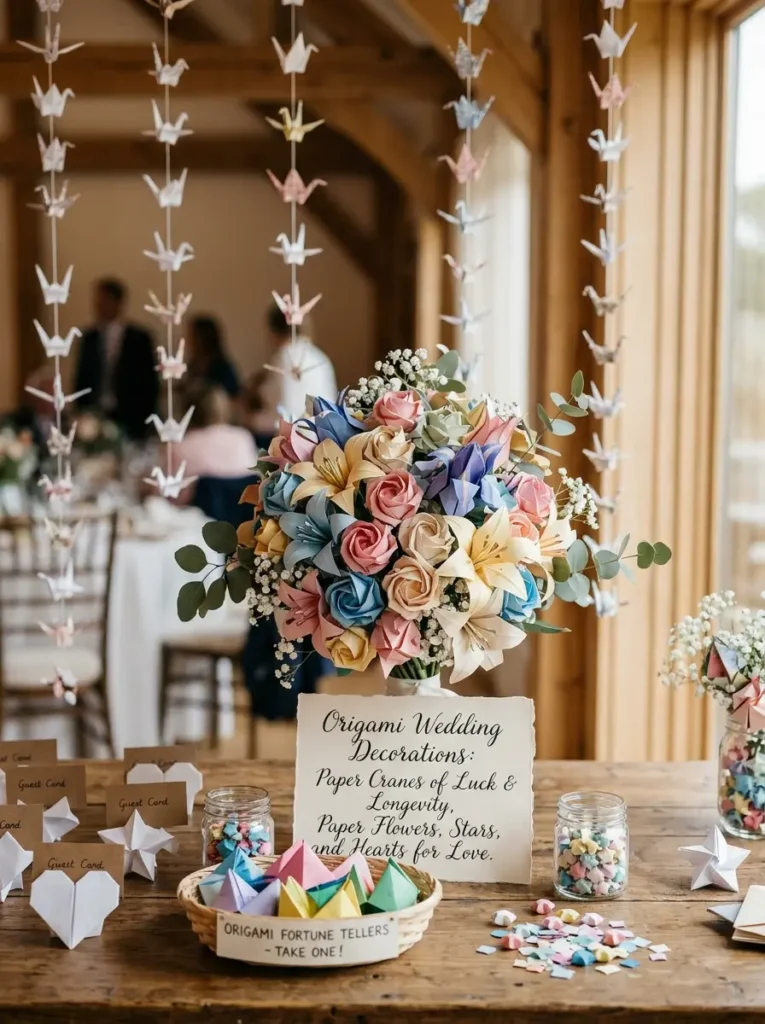
19. Origami Wedding Decorations
Origami — the Japanese art of paper folding — offers a wide range of elegant wedding decoration possibilities. Paper cranes are a beloved wedding symbol of luck and longevity, while origami flowers, stars, and hearts can be used as table decorations, escort card holders, or ceremony confetti alternatives.
Materials Needed:
- Square origami paper in your wedding colors
- Patience and practice time
- Thread and needle for stringing garlands
- Optional: metallic or patterned paper for visual interest
Popular Origami Wedding Projects:
- Hanging crane garlands above the reception
- Origami flower centerpiece fillers
- Individual cranes as place settings or favor toppers
- Paper star garlands for ceiling installation
Time Required: 5 to 15 minutes per piece depending on complexity
Difficulty Level: Beginner to Intermediate
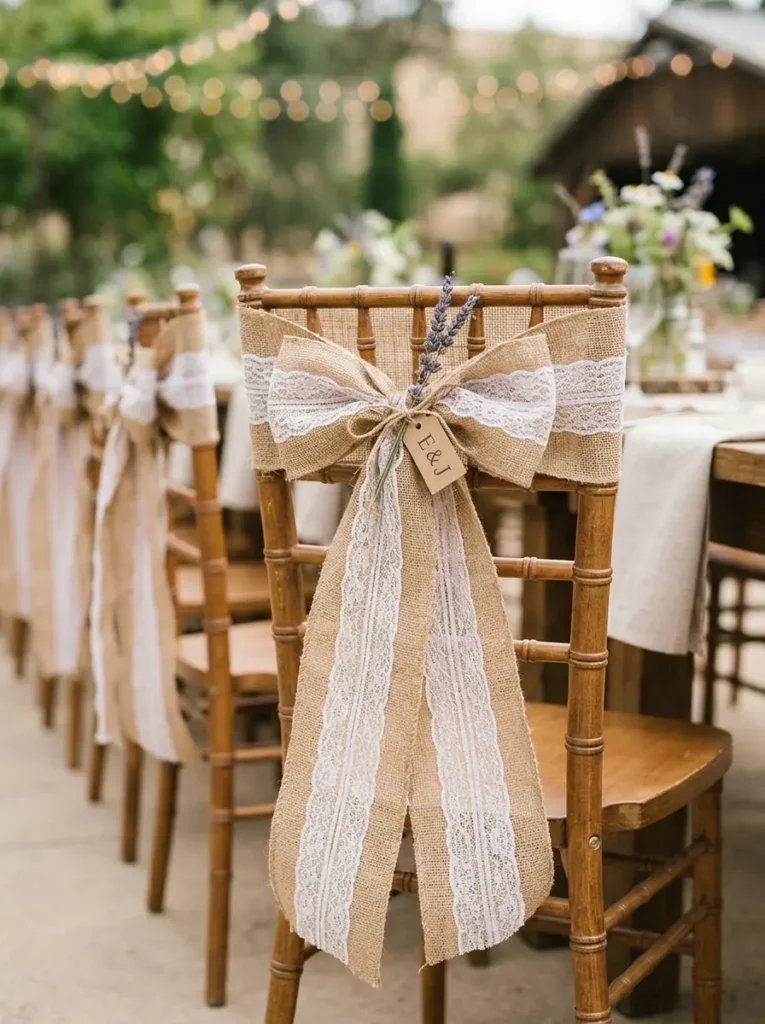
20. Burlap and Lace Chair Sashes
Chair sashes tied in soft bows transform plain venue chairs into intentional, styled elements of your wedding aesthetic. Burlap and lace combinations are perfect for rustic or bohemian weddings, while satin or chiffon sashes suit more formal celebrations.
Materials Needed:
- Burlap fabric cut into strips (approximately 6 inches wide by 60 inches long)
- Lace trim ribbon
- Hot glue gun or needle and thread
- Scissors
How to Make It:
Cut burlap strips to length, fray the edges slightly for a rustic effect, and glue or sew a strip of lace trim along one edge. Tie around the back of each chair in a simple bow, adjusting the tail length to your preferred style.
Time Required: 3 to 5 minutes per sash; budget 4 to 5 hours for 100 chairs
Difficulty Level: Beginner
Cost Savings: Professional chair sash rentals cost $2 to $5 per chair; DIY materials cost $0.50 to $1.50 per chair
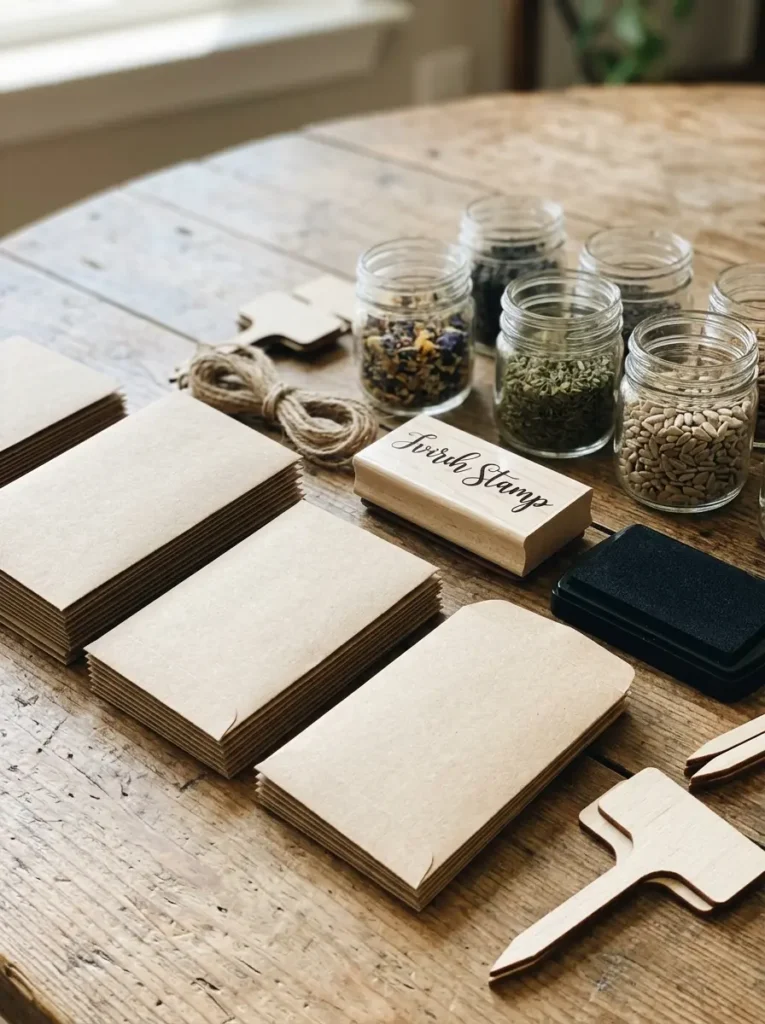
21. Personalized Seed Packet Favors
Seed packet wedding favors are among the most thoughtful, eco-friendly, and meaningful favor ideas available. Package wildflower, herb, or vegetable seeds in beautifully designed envelopes that guests can plant at home, growing something living from your wedding day.
Materials Needed:
- Seed packets (purchased in bulk)
- Custom-designed envelopes or kraft paper packets
- Personalized labels with your names, wedding date, and planting instructions
- Twine for bundling
Best Seeds for Wedding Favors:
- Wildflower mixes
- Lavender
- Sunflowers
- Basil or rosemary (culinary herbs)
- Sweet peas
- Forget-me-nots
Time Required: 1 to 2 hours for 50 to 100 packets
Difficulty Level: Beginner
Cost Savings: Custom seed packet favors from vendors cost $2 to $5 each; DIY versions cost $0.30 to $0.80 each
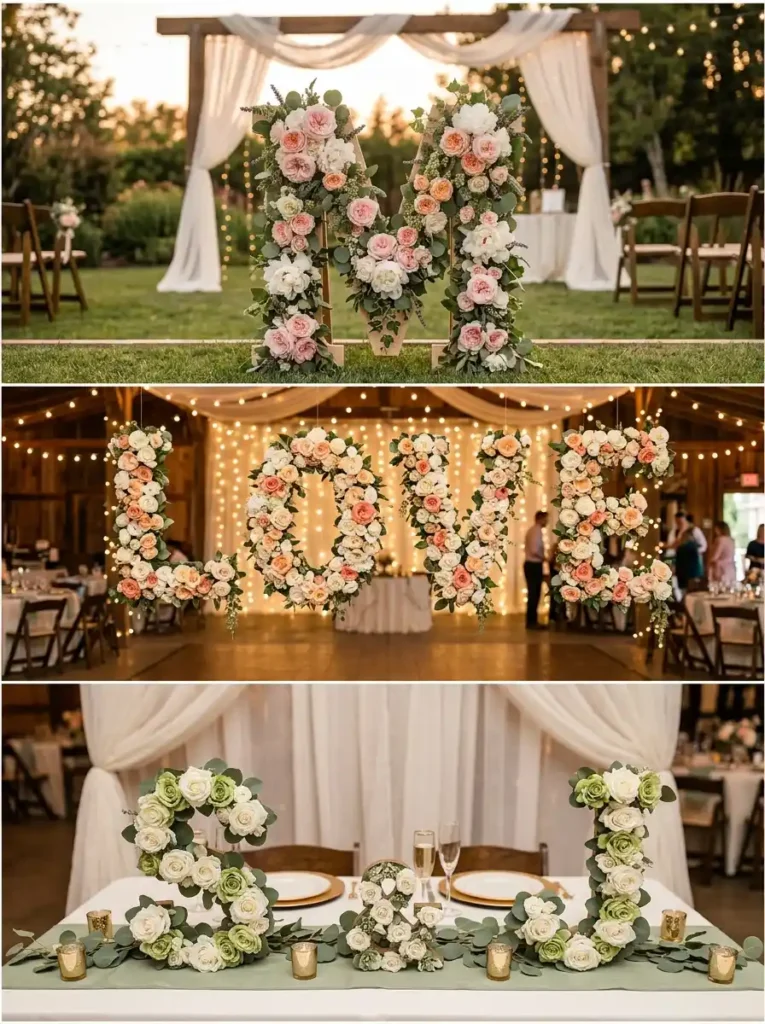
22. DIY Floral Letter Monogram
Large letters covered in fresh or artificial flowers spelling out your initials or a meaningful word make for a dramatic, photogenic statement piece that works beautifully as a ceremony backdrop element, reception focal point, or sweetheart table decoration.
Materials Needed:
- Large papier-mâché or foam letters (available from craft stores)
- Fresh or silk flowers in your wedding colors
- Hot glue gun and glue sticks
- Scissors and wire cutters
- Optional: small greenery and filler flowers
How to Make It:
Cut flower heads from their stems, leaving about one inch of stem. Working in sections, hot glue flowers closely together across the surface of each letter, mixing blooms of different sizes for a full, lush effect. Fill any gaps with small filler flowers or individual petals.
Time Required: 2 to 4 hours per letter depending on size
Difficulty Level: Beginner
Cost Savings: Custom floral monogram letters from vendors cost $80 to $200 each; DIY versions cost $15 to $40 each
Wedding DIY Crafts Planning Timeline
4 to 6 Months Before the Wedding
- Design and order all printed materials (labels, tags, invitations)
- Purchase bulk materials and store safely
- Complete macramé projects and large installations
- Begin drying flowers if using dried botanicals
- Make test versions of all projects
2 to 3 Months Before the Wedding
- Complete paper flower backdrops and large décor pieces
- Make candle favors (they need time to cure properly)
- Complete signage and table number frames
- Assemble origami decorations and garlands
1 Month Before the Wedding
- Assemble terrarium centerpieces
- Complete escort card displays
- Finalize favor packaging and labeling
- Make photo booth props
1 Week Before the Wedding
- Assemble mason jar centerpieces (without fresh flowers)
- Complete chair sashes and ribbon wands
- Gather all finished crafts and transport to venue storage
Day Before the Wedding
- Add fresh flowers to centerpieces and arrangements
- Make flower crowns if using fresh blooms
- Final assembly and styling of all installations
Wedding DIY Crafts FAQs
How much money can I save with DIY wedding crafts?
Couples who embrace DIY wedding crafts typically save between 20 and 40 percent of their total wedding décor and stationery budget. For a wedding with a $3,000 décor budget, this could represent savings of $600 to $1,200 or more, depending on how many elements you make yourself.
What are the easiest DIY wedding crafts for beginners?
The most beginner-friendly wedding DIY projects include mason jar centerpieces, personalized signage with chalk markers, seed packet favors, ribbon wands, photo booth props, and candle centerpieces with greenery. These projects require no specialized skills and can be completed quickly.
When should I start making DIY wedding crafts?
Start as early as possible — ideally four to six months before your wedding date. Projects like dried flower arrangements, macramé pieces, and paper flower backdrops are time-intensive. Starting early also gives you time to order replacement materials if something goes wrong.
How do I make DIY wedding crafts look professional?
The key to professional-looking DIY wedding crafts is consistency and attention to finishing details. Use the same color palette throughout all projects, invest in quality materials rather than the cheapest options, take your time with each piece, and always make a test version before committing to your full quantity.
What tools do I need for wedding DIY crafts?
A well-stocked DIY wedding craft kit should include a hot glue gun with plenty of glue sticks, sharp scissors, a craft knife and cutting mat, floral wire and tape, a ruler and pencil, various paint brushes, and a reliable printer for custom labels and cards.
Can I involve my bridal party in DIY wedding crafts?
Absolutely — and it is highly recommended. Host crafting sessions with your bridesmaids, family members, and close friends. Not only does this distribute the workload, but it turns crafting into a joyful pre-wedding celebration in its own right. Provide snacks, music, and wine, and enjoy the process together.
Final Thoughts
DIY wedding crafts are one of the most meaningful investments you can make in your wedding celebration. Every handmade centerpiece, every hand-lettered sign, every carefully assembled favor represents time, love, and creative effort poured directly into your special day.
The imperfections in handmade details — the slight unevenness of a hand-lettered sign, the organic asymmetry of a macramé arch — are not flaws. They are the fingerprints of the people who made them, the evidence of love and care that no professionally manufactured product can replicate.
Use these 22 wedding DIY crafts ideas as your starting point. Choose the projects that genuinely excite you, recruit your favorite people to help, start early, and enjoy every minute of the creative process. The result will be a wedding filled with handmade heart — and that is something truly priceless.
Inspired by these wedding DIY craft ideas? Save this article to your planning board and share it with your bridesmaids for your next crafting session together.
You Might Also Love:
- Budget Wedding Ideas That Look Incredibly Expensive
- DIY Bridal Bouquet: Step-by-Step Guide for Beginners
- How to Plan a Beautiful Wedding on a Tight Budget
- Handmade Wedding Favor Ideas Your Guests Will Actually Love
- DIY Wedding Décor Ideas for Every Style and Season